Creating Summer Troopers

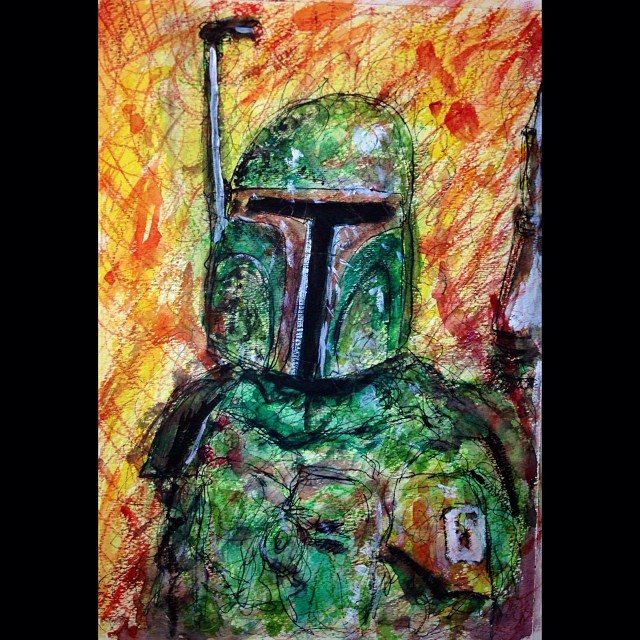
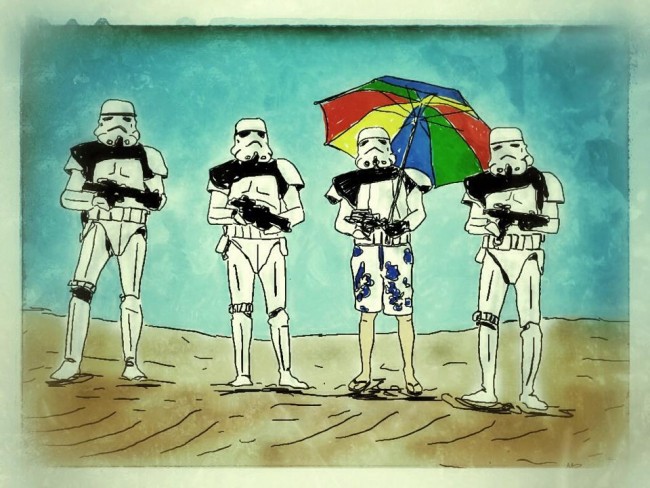
Let's face it, here in the Northeast, we're all beyond sick of snow this winter. So besides complaining on Facebook, I found a little inspiration to follow hoping it leads to sunny days soon. I was perusing my Facebook stream and came across the following photo from the Star Wars page I follow (don't judge). As soon as I saw it, my mind saw the image I needed to create.

1956773_704641286254142_160972910_o

The following was my process on creating "Summer Troopers" as a digital art file on my iPad.

First I downloaded the Trooper photo from Facebook to my photo camera roll on my iPad.

Then using an app called "Sketchclub" I created a new document and placed the photo on the first layer. After rotating and scaling, I changed the opacity to somewhere around 50%.

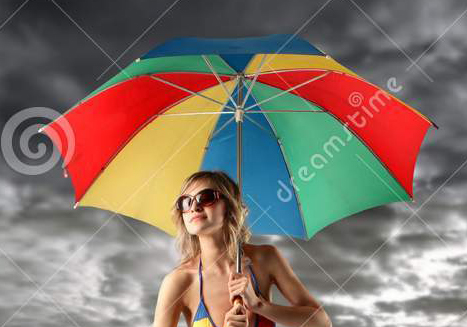
The I went hunting for the additional images I needed to use as source for the umbrella and man's legs/swim trunks. Once I found those I imported them on separate layers, scaled them, cropped out all the excess of the image and change the opacity to 50% as well.

http://www.dreamstime.com/royalty-free-stock-images-rainy-image9690409Photo Feb 27, 3 01 30 PM

Starting with the Trooper layer, I selected a new layer where my black line art would live. Once I hid the umbrella & swim trunks layers - I was ready to trace over the troopers with a black fountain pen setting.

Photo Feb 27, 9 16 33 PM

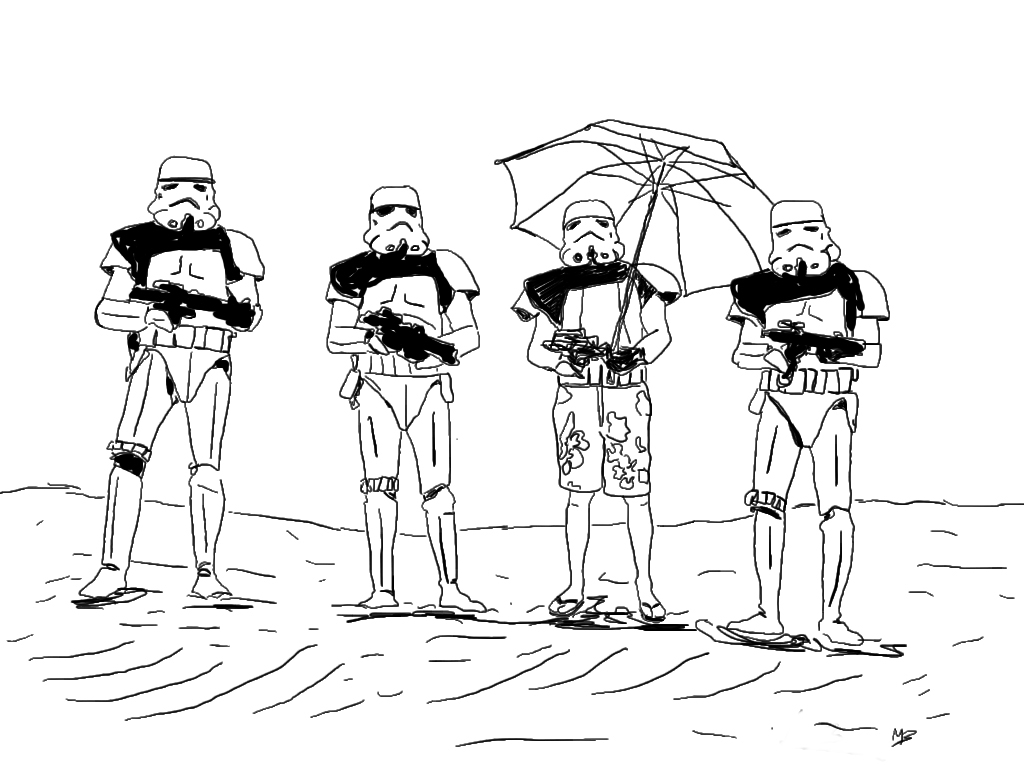
I did the same process for each the umbrella layer & the swim trunks layer until my black line drawing was complete. Then I selected another layer where i added flat colors for the ground and the sky. I placed this layer underneath the line art. I then created another layer on top of the flat color to add a few shadow spots and set the layer to "Darken" mode and decreased the opacity to taste. The only portions left to color were the umbrella and swim trunks, so I created another layer directly under the line art and applied the color with a brush tool.

Photo Feb 27, 7 31 21 PM

Once my art was complete I saved a JPEG back to my camera roll. Then I opened that Jpeg in an app called Snapseed (a great little photography app!). In Snapseed I adjusted some contrast, saturation (in the "Tune Image" area), added a frame from one of the presets (Frames) that gave it a nice messy edge, and lastly some texture (The Grunge feature - messed around until I got the style & strength I wanted), added some "scratches" for final touches. The reason I added a frame and then the grunge waas so that the grunge effect would show on the frame as well as the image area. Finally, I exported again to my camera roll and Viola - the final digital image of "Summer Troopers"

summertroopers

I hope you enjoyed that quick description of my process. Just remember - have fun, play and remember there's a bunch of tools and methods to help you experiment! Happy creating!


Confession of Failed Art

Fail This past week I relearned a lesson in not ignoring the "small" stuff. You know, the stuff that you do all the time so you tend to not give it as much attention or care. I set out to do a watercolor painting based on an interesting photo I found on the internet. I took this to my weekly class, as I thought it would be good to have some guidance and support in rendering the extreme shadows (just in case).

My issue became that I just plain rushed the drawing part because I was so concerned about getting the extreme dark and shadows right. I didn't take the proper time to set myself up for success in this project. I rushed and was lazy with LOOKING at my source properly. As a result, when I started painting, things were just "off". No matter how hard I tried to "fix" areas, there was no turing back at this point. I could either commit to finish it as best I could, or scrap it and start over. I didn't have the motivation to start over, and although I wasn't pleased with my results, I pushed myself to finish. When I did, I was missing that satisfied feeling. I felt rather depressed and left myself open to those critical voices that are always looking for an opportunity to tell you that you aren't any good (and here was proof).

But instead of wallowing in my dissatisfaction, I determined to do as I have everyday in the past 10 months - to post it publicly as part of my year of daily drawings/paintings. I reminded myself that tomorrow was another day to create fresh. And I didn't allow myself to "throw the baby out with the bathwater". I asked myself questions: Why did it "fail"? What made it a lesser piece of art? How could I learn from this rather than just feel bad? Sometimes you need those experiences to learn and grow as much as the momentum of doing great work. I know you're wondering what painting I'm referring to, so to satisfy your curiosity look here.

How do you handle your moments of "failure" and dissatisfaction with your creations? Maybe there's a learning opportunity there for you too.


3 Choices That Will Kill Your Art Before It's Created

knife The pressure to create can sometimes be stressful. There are many outside and inside forces at work that seek to destroy your creative spirit before it even lifts a finger. Here's 3 choices I have found can kill your art before it even has a chance to see daylight:

1. Waiting For Permission

Don't wait for someone else to tell you it's ok to create your art. Don't wait for an invitation. It will never come. And more urgent and "responsible" things will come to sway your attention. Create and create some more because you HAVE to.

2. Seeking Constant Validation

Everyone like's a word of encouragement, or a fist bump for your soul in the form of some Facebook Like's, Retweets, or Instagram Hearts. But basing your artistic self worth on the opinions of others is a recipe for disaster. Be who you are. Be true to YOUR art, even if you are still trying to figure out what that is. Everyone starts there. Give yourself a break.

3. Befriending Perfectionism

Wanting to be excellent is a worthy pursuit. But if you struggle with the voices of Perfectionism in your head you know all too well the following lies:  "You suck, don't even get started on this because you know it's going to fail", "What gives you the right to think someone will care about your Art when there is so much great Art out there already." and "You are not a REAL Artist. Real Artists don't make art like THAT." Kick Perfectionism in the teeth by showing up to do the work each and every day. And if you're brave enough, share your art, especially when you think it's sub-par.

Scribbling Star Wars

484810_10151932732645958_316841998_n I've been experimenting with a scribble style lately, with Star Wars as my subject matter. This experiment is forcing (sorry for the pun) to keep things fast & loose. It seems the more "successful" ones are where I push myself to just keep moving. Scribble more. Stop & adjust less. My line is a continuous line drawing (you don't pick the pen up from the page at all) using various black inks. Most of the color is watercolor paint, watercolor crayons or pencils. Some spots are non-diluted by water. Every so often I hit a spot with a dark blue china marker. And then I add some white gouache and black watercolor paint. This helps to keep things from breaking down completely, keeping to some highlight & shadow values. It helps give the subjects some form.

25cc8f0c764911e3b4fb121aff19a5a5_81ba00cf6774911e3a10e12a33c4cbee0_8df83cec0780f11e38b4f1280e484f25a_88819206678d911e3928a0e05f3709127_8

To be honest, the first one (Yoda) was the hardest. I wasn't feeling loose. I kept worrying about if things looked "right". It's hard to keep yourself moving. That perfectionist voice doesn't like that. So this is another way to beat him. Keep it fast & loose.


Today I did my Skywalker scribble. I chose this scene, rather than a straight up portrait, because this is my favorite scene from Star Wars: A New Hope. Luke's world has been rocked. His aunt & uncle are dead. He's at a crossroads. He must decide to stay behind and try to pick up the pieces or move ahead into an unknown (and potentially) dangerous adventure. This scene always speaks to me of hope, longing and a sense of destiny. Powerful themes in my own life.

Arrival

1451379_10151799033850958_1891689840_n This piece was inspired by something I read in "The Artist's Way" by Julia Cameron.

Remember that art is process. The process is supposed to be fun. For our purposes, “the journey is always the only arrival” may be interpreted to mean that our creative work is actually our creativity itself at play in the field of time.

(Cameron, Julia (2002-03-04). The Artist's Way. Penguin Group US.)

And then there was this on Danny Gregory's blog:

Because being an artist is a cause you choose for yourself, the rewards are in the journey, and there is no Promised Land. You have to want to proclaim your vision, to broadcast your voice, to change the world. The finish line doesn’t lie at the doors of the Whitney Biennial, it lies at the grave. Every day is a lesson and a revelation and they follow one after the other to the horizon, providing their own reward.

I was also listening to Switchfoot's song Thrive, where this lyric struck me:

Feel like I travel but I never arrive. I want to thrive not just survive.


Perhaps if you have a divine discontent, a restlessness of the soul, you can relate. I need to constantly remind myself that it's not only about the future, the end result. When the dream is attained. But I need to enjoy the NOW, the journey, even though I know I am undone. So today, I create again. I start the cycle again. And when Today comes to a close, Tomorrow brings a fresh start. And I must begin again. Every day when I awake I am back to zero. It doesn't matter what I did yesterday. The act of creating helps me live in the moment. So, I must keep creating. I want to THRIVE, not just survive.


Art Process: A Pear of Grapes

Did you ever look at a piece of art and wonder how it got to the finished piece before you? It's a rare thing to see art as it goes through it's various stages. Well, today I'm going to let you in on my process for this watercolor still life I've called "A Pear of Grapes". First, I set up some fruit and lighting (for some drama) to my liking. I knew I wanted a few different areas to avoid everything all clumped in the same place.

Photo Nov 03, 3 25 32 PM

Next, I taped down a piece of Watercolor paper (Strathmore 140 lb) to a foam board. I'm using Winsor & Newton brushes and watercolor paints at the moment. Also pictured in a kneaded eraser, an HB Graphite pencil and two plastic jars for water.

Photo Nov 03, 3 19 29 PM

I started off with a simple pencil sketch to block out my composition.

Photo Nov 03, 3 25 49 PM

Starting with the lightest color, I lay down some wash of watercolor paint.

Photo Nov 03, 3 30 09 PM

From there, I move on to add more color and a bit of texture, still keeping things light.

Photo Nov 03, 3 44 06 PM

I keep layering to get things a bit darker, while still keeping some light areas.

Photo Nov 03, 3 55 00 PM

I work the main subject until I feel like I'm at a good place to switch things up (or waiting for an area to dry before working a bit more).

Photo Nov 03, 4 14 35 PM

Now, I lay down some color to the foreground, knowing that I'm going to add more texture so I'm not concerned with getting my watercolor smooth.

Photo Nov 03, 4 22 47 PM

I do the same for the background, as well as now going back into my dry areas on the fruit to add more texture and lines. I've also added some darker shadows at this point

Photo Nov 03, 4 42 54 PM

Now I apply the texture in the foreground area using a darker hue and more pigment of the watercolor paint.

Photo Nov 03, 4 46 05 PM

Then I add a little more texture to the background and foreground. And to put some finishing touches, I use a bit of white Gouache for some highlights.

Photo Nov 03, 5 15 30 PM

And there ya have it folks. Hope you enjoyed a little peek into my process!


The pen is mightier than the... pencil?

pens Back in April, I picked up a book by Danny Gregory called "The Creative License". This was a huge step in reintroducing me to a drawing habit. One of the things he encouraged in his book was to use a pen not a pencil. Why? Because when using a pencil, we have a tendency to make less confident lines, and erase again and again. That coupled with a perfectionist streak can spell trouble for a completed work ever seeing the light of day.

So I took the challenge. At first it was awkward. I wanted to redo some lines and strokes, but had to learn to live with the lines I had made. I had to learn how to make mistakes a part of the beauty of the work. Pen has taught me to make a more confident line. I had poked perfectionism in the eye.

The funny thing is, when i returned to pencil recently, there was less erasing and fretting. Less giving perfectionism a foothold. More confidence.

Back in the day when I first started learning to play guitar, I had an old Yamaha acoustic guitar that had a tree trunk for a neck. At least that's what it felt like. I struggled and filleted my fingers until I had my chord changes down. Over time, I got used to it. And when I got an electric guitar, I marveled at how smooth and easy it was to fret my chords.

Sometimes we need to push ourselves to embrace difficulty, discomfort or resistance. You just might be amazed how it impacts your growth.


How This Moth Took Flight: My Artist Process

A couple of weeks ago I announced the winner of my contest. Jeannie Pauly (@rovingsprout on Instagram) was the lucky winner with her submission of her huge moth photo.  A perfect Autumn subject (and yes, kinda creepy). The original art will be en route to her this week! image

I figured I'd take this opportunity to not only show the final illustration that Jeannie will be receiving but also show a bit of my process. I know that as an artist I love to see other artist's process. So here we go:

First, I go right to drawing out the moth and surrounding pole / background with my Staedler pens (black waterproof ink - 4 pen set sizes .1 .3 .5 .7). I start with a .3 in size and work my way up to a .7 where I want to add a little thicker lines and darker areas. I used to start with pencil, but found that I erased too much & was too noncommittal in my line. I switched it up after reading a book challenging me to go right for pen, as it helps you with more confident line. And it forces you to work with the line you've made, rather than to get stuck in constantly erasing & redrawing, never moving on to the rest of the process.

Photo Sep 29, 3 19 15 PM

Then I lay down some watercolors - starting with lighter colors and hues. A little wash here and there. A happy little moth. For brushes, I primarily use water brushes like these. But on this one I also used a few watercolor brushes I have kicking around. Nothing special.

Photo Sep 29, 3 24 57 PM

I build that up getting darker and darker, defining more of the shadows.  I have several sets of watercolors I use. It usually is more about selecting the right colors than sticking with a certain brand. I used a few different pan sets for this one. I tend to like colors that pop, and didn't want to keep the brown and almost monotone feel of the original photo.

Photo Sep 29, 3 38 53 PM

Then once the watercolors are dry, I'll go back in to a few spots to hit with a darker black Take-sumi ink (that isn't waterproof). I use my TWSBI pen for this finishing touches stage. And, voilà...

Photo Sep 29, 4 11 57 PM

And there you have it folks.  Here's the original and the final art! I give you "Moth-er, May I?"

FINAL_MOTH


Confession of a Dying Artist

RIP Something inside of me started to die. It was a slow death. Barely noticeable. It went on for years. Somehow, I think I knew something was wrong but I couldn't put my finger on it.

I've spent years using my art (mainly graphic design) to support the cause or endeavors of others. That's what I get paid to do. To use my art to create a logo for someone's product, someones else's message slides, someone else's company and ideas. Nothing wrong with that. But, I finally realized what had been slowly dying all these years. My personal art expression. My message. My voice in my art.

Doing design for others isn't the correct place to insert your personal message/expression. I'm hired to communicate their message, their identity. BUT I came to realize that I had stopped pursuing avenues of my own expression. And it slowly began shortly after graduating art school.

Earlier this year, I began a journey back to my passion - creating art "just because". Creating because my soul needed to. Creating art not for the masses but for personal expression. And something wonderful happened. I felt the cold dead place inside start to come back alive.

I made a fatal error early on in my design career. I don't even know if it was conscious (I don't think it was). I took on an either/or approach to my art. Either I could do commercial work (and get paid for it), or do personal art expression (and not get paid for it). And just like the carpenter who lives in a home where the carpentry needs go unmet - I felt like after doing "art" all day long who had time or energy for more when I got home?

When it comes to creating commercial and personal art, it isn't about either/or but rather and/both. Both are vital to creative health. Who knows, maybe one day the two lines will blur more for me and I'll get paid to create my personal expression art. But until then, I'm making sure I don't loose sight of pursuing both.

What about you? Do you ever feel that tension?


Illustration by Mike Brennan

Beautiful Mess

horseeye I read these words tonight on Danny Gregory's blog, and it resonated. How about you?

Organization is irrelevant to making stuff. Art needs to be messy. A neat stall is the sign of a dead horse.

The more responsible side of me wants to make sure I can contain my art and process, and not get too dirty in the process. Sanitize it. But there can be (and should be) beauty in mess. Here's to more art birthed in mud and mire.

{photo credit}